How to trace a papercut as a template
I try to make it a habit of tracing my artworks once they are ready.
Having a digital vector file of an artwork has quite a few major benefits:
I can use this file for printing posters or postcards
If I want to make a copy of my artwork - I can easily make one: I will just print this file and cut it, line by line.
I can also use this file for Cricut / Silhouette cutting machines or laser cutter to replicate my work.
And of course this is how I make my printable templates.
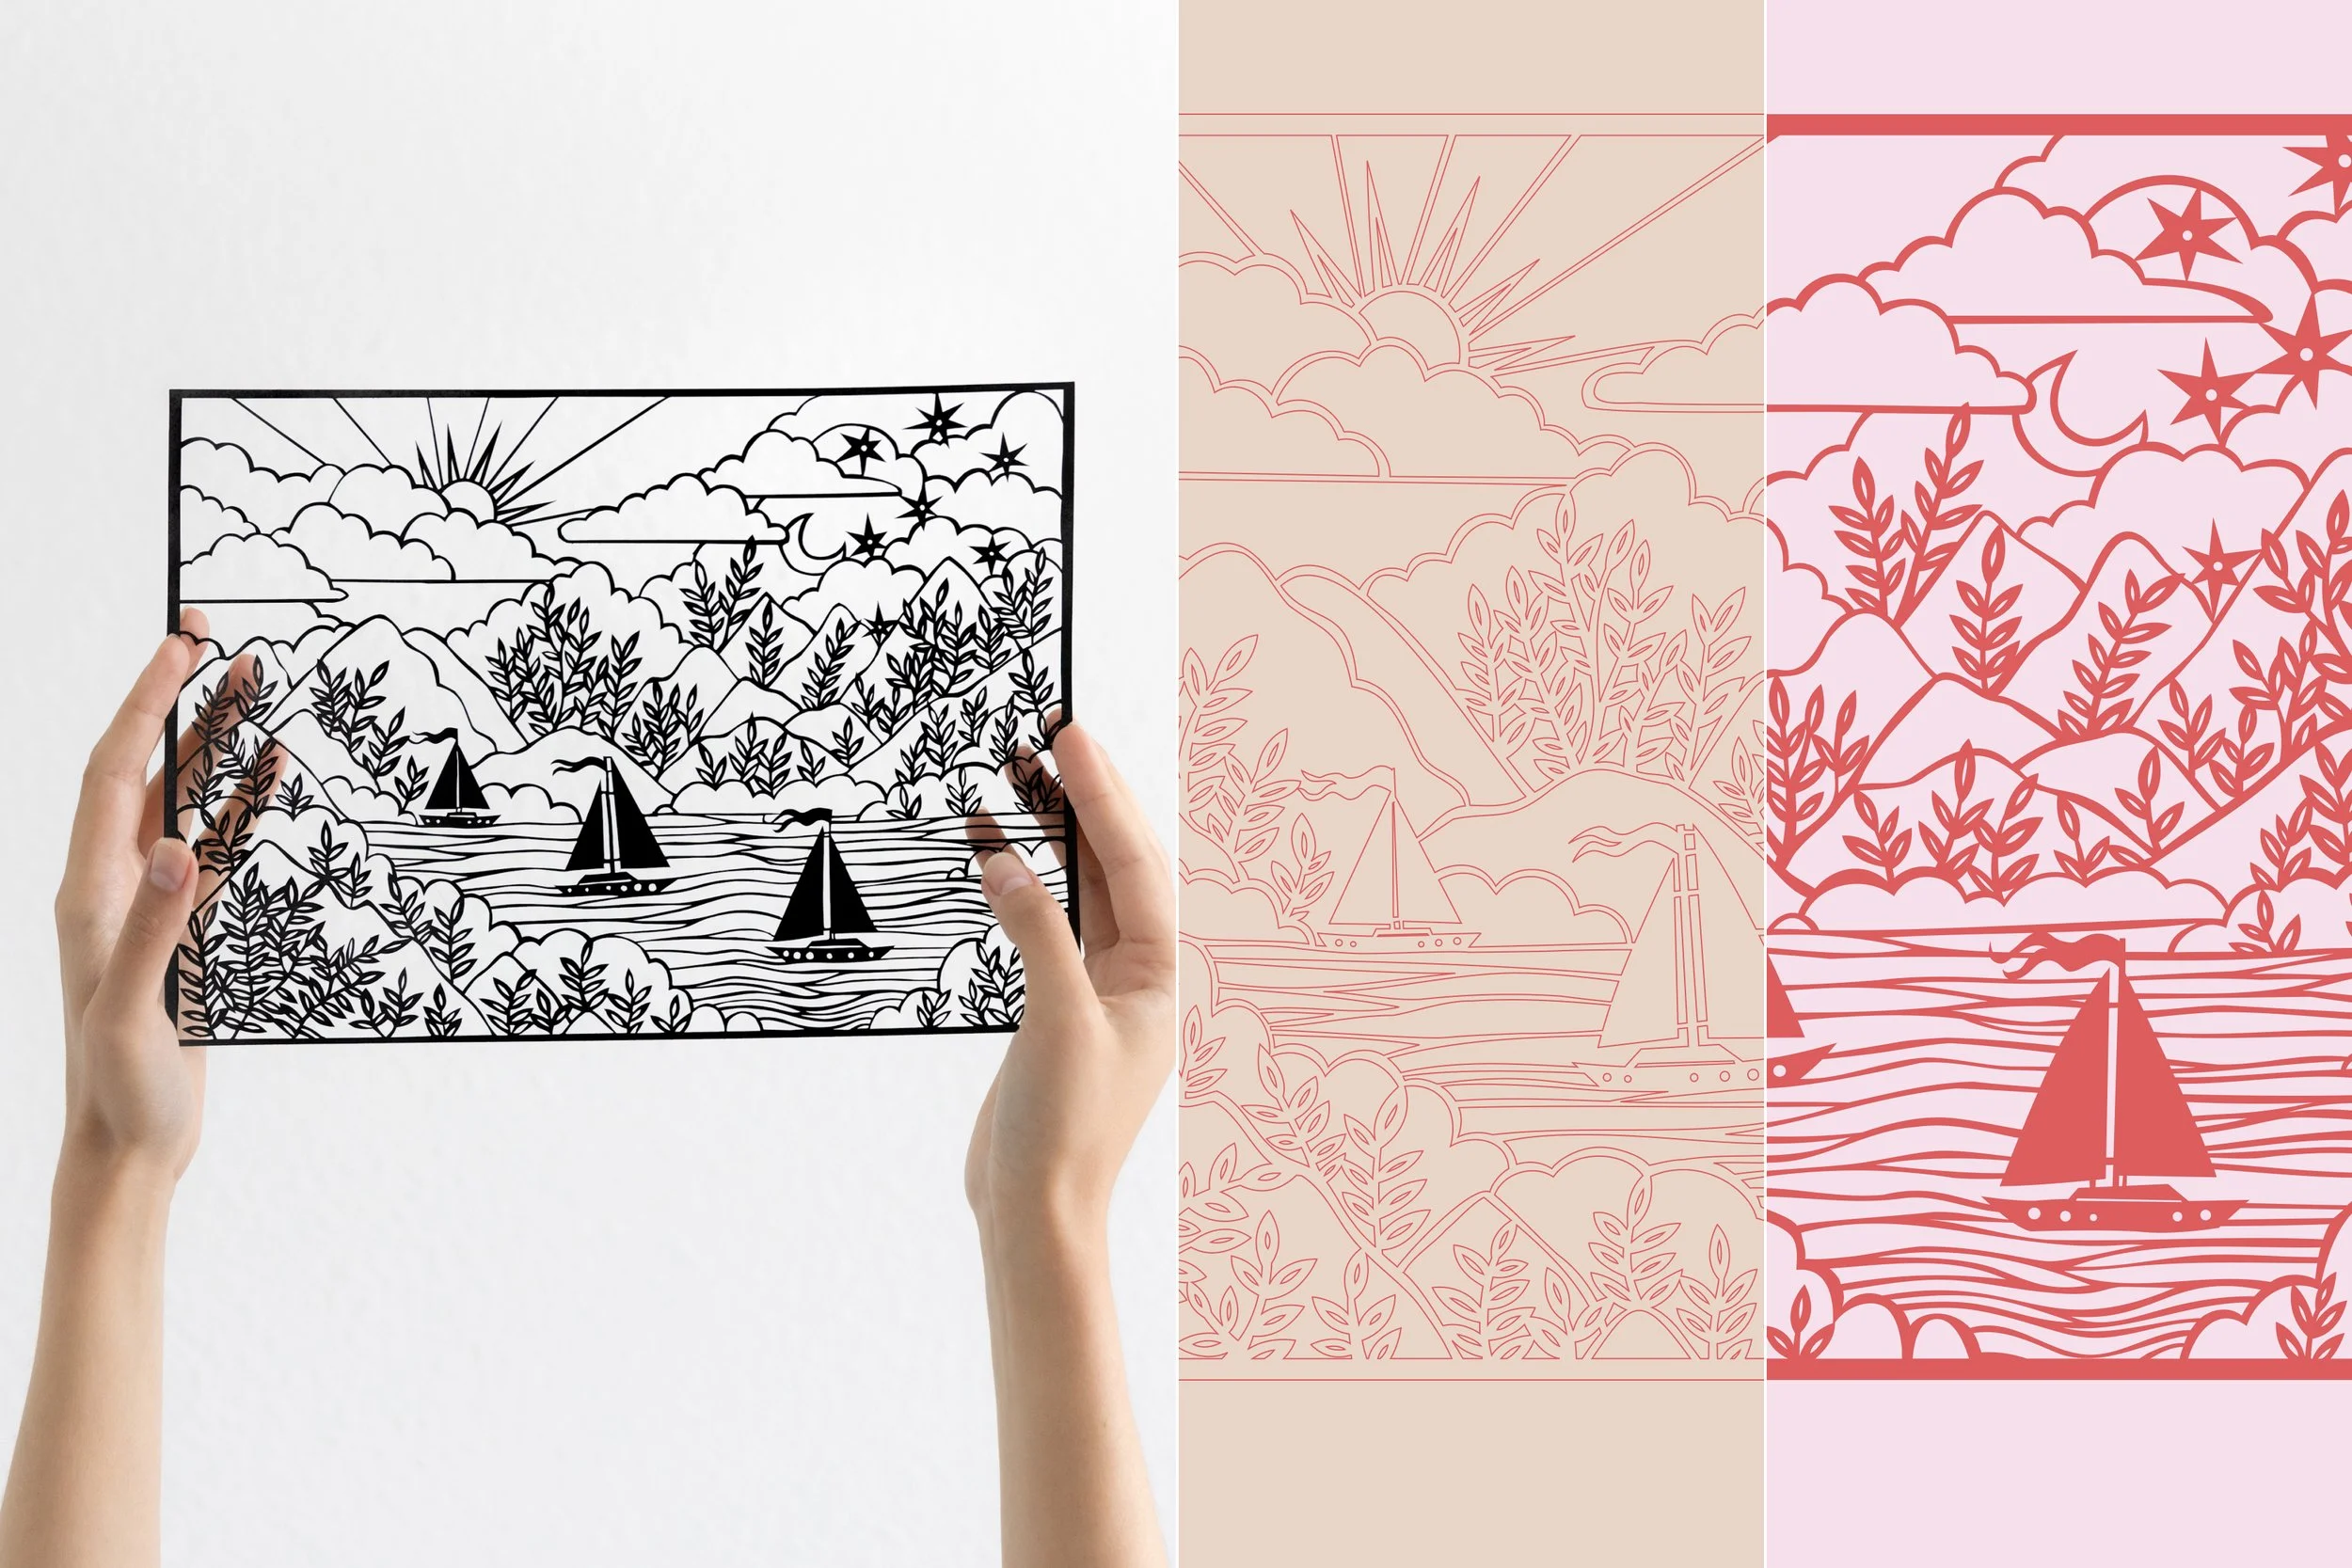
Here you can see one of my papercut artworks - Sailing in the Clouds - side by side with it’s traced version. Because I made a digital vector file, I can easily change colours and add outlines to the image.
Disclaimer
Before I dive into the details, I want to emphasize a few things.
Firstly, my method of tracing artwork is not perfect. I came to this process after lots of trials and errors, finding a way that works for my skills, equipment that I had, and the preferred result it gave.
This process works for my type of papercuts, but it might not work for everyone. Some elements might be useful for your artwork, while others may not. That’s perfectly fine - we all have different approaches. Take what you find useful and apply it to your art as you see fit.
Secondly, I must admit that tracing is my least favourite part of the papercutting process. It is very time-consuming process, often taking as much time as cutting the artwork itself. While I see a great value in having a digital file of my artwork, I generally do not enjoy this process.
Lastly, my image tracing method prioritises precision. While there are many online "photo to vector" apps available, I have yet to find one that captures all the details of the artwork in high quality. AI is developing rapidly, and I hope an easy solution will emerge soon. Until then, I rely on my more time-consuming method of tracing to ensure accuracy.

In a nutshel…
I use an iPad to trace my papercuts.
I take a photo of my papercut and then trace it in one of the two apps I use: Adobe Fresco and Affnity Designer app. Both are free-to-use apps.
I use Figma app (on my laptop) to manage files: colours, outlines, etc.
I very rarely use Adobe Illustrator for its "Simplify Paths" feature to reduce the file size.
Adobe Fresco
This is the app I used regularly when I first started papercutting. Nowadays, I don't use it as often, but it still comes in handy when I need to trace hand-drawn elements.
Using this app feels very similar to the actual drawing process. It features pencil and pen brushes, making it easy to use if you are not comfortable with vector curves. By drawing directly on top of your papercut, you can mimic and follow every line and curve, resulting in a very realistic trace.
However, a major downside is that it creates a lot of path points, making the image file very heavy. This isn't a problem if you're using the file for printing or as a backup of your artwork. However, it poses a significant disadvantage if you plan to use the file with a cutting machine like Cricut. Too many path points can complicate the cut and potentially damage the paper.
A solution to this issue is the "Simplify Path" feature in Adobe Illustrator. Once your file is ready, upload it to Illustrator, select all elements (Cmd + A), and go to "Object > Path > Simplify." You can adjust the settings to determine the extent of simplification and compare the new lines to the original ones to ensure it works. Be aware that Illustrator may round out sharp corners, so you might need to manually fix these afterward.
Another limitation of this app is that it does not allow exporting files in SVG format. The only common vector format it supports is PDF. While this is not an issue if you're printing your traced file, it is inconvenient if you want to use it with a Cricut cutting machine, which does not support PDF. However, you can easily convert a PDF to SVG using online tools, such as this site.

An important update from my future self:
Unfortunately, over time Linearity Curve has changed significantly in a way that does not suit me anymore. Most of the basic features, including the ability to export vector files - essential for a vector art app - are now premium features costing more than an Adobe Illustrator subscription…!
For this reason, I have switched to the Affinity Designer iPad app, and I am very happy with it so far. There is a learning curve with the app, but I think it's worth it!
Linearity Curve
This is the app I use most of the time.
It’s a more typical vector drawing app, so if you’re not familiar with drawing using vector paths, some training may be necessary. While it has a pencil tool, it doesn't mimic the “drawing” effect as well as Fresco.
However, this app excels at what it’s designed for: drawing in vector. Once you understand how vectors work—and the app provides plenty of tutorials—the interface and features are very straightforward. Despite its simple appearance, it has been able to handle everything I need.
I prefer this app because it allows me to create lightweight files and offers the flexibility to move and reshape elements easily (something Fresco is less adept at). Exporting files is also very straightforward.

Figma
I am a UX designer by trade (I work for a big fashion brand as my day job), so I am probably quite biased when it comes to this app.
Figma is an interface and prototype building software that has become the number one tool for anyone in product design. Since I use it for work on a daily basis, I know this app pretty much inside out.
I use this app to structure my vector files: check if all looks well, change colours, add/remove background, edit naming, etc. I also use this app for a final file layout and export.

Step-by-step
There are lots of different ways to trace the image. My preferred way is very similar to how I approach my papercutting process.
If I am working with a relatively simple illustration - for instance, a single flower, a butterfly, or something similar - I would first outline the border and then will move to details. Since I typically do black-and-white papercuts, I would also outline the outer shape (the background) in black and then do “cuts” in white. I would then “merge” all the white parts and will “subtract” them from the black background. Doing the last step would allow me to have a single vector file with a transparent background, so I can for instance use it for Cricut. If I don’t merge everything together - Cricut would “read” it as separate tiny files, and would not cut it as a single template.
For more complex papercuts - for instance, a character portrait or a pet commission artwork - I would usually start tracing from a central or main element outwards. This way I make sure that the most important element is ready and look as I want it to. The remaining work for the complex papercut remains the same as for the simple one.
Here’s how I usually do my tracing:
Take a Photo: I take a photo of my papercut and import it into theAffinity Designer app on my iPad.
Outline Elements: I start by outlining all the elements, one by one. First, I outline the main shape, then trace all the “cuts.”
Merge/Subtract Elements: I merge and/or subtract all the elements to create a single illustration.
Export as SVG: I export the illustration as an SVG file.
Simplify Paths: If the image is complex, I run it through Illustrator and use the “Simplify Paths” feature, then export it again as an SVG file.
Create Etsy Templates: If I’m making a template to sell on Etsy, I create greyed-out and outlined versions of the file in Figma.
I hope this is helpful! ✨
Hi friend,
If you’d like to read more about papercutting and stay up to date with my art journey - you can sign up to my newsletter ✂️
- Marina